Defining the statistics you have to play against one or more tables in a database
For an example, we are going to implement statistics against the dictionary. These statistics are excerpted from Carrie Ballinger’s Blog, to make everything clear!
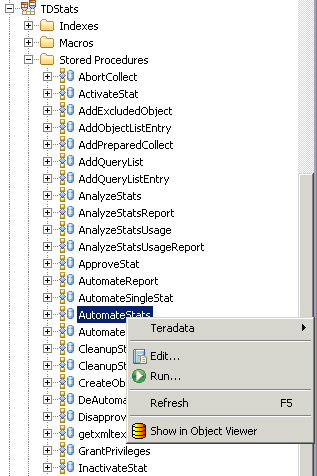
First of all, we must play the following script in order to register the statistic in the dictionary. Though, statistics will be collected one time, but it’s not enough, you will need to synchronize the dictionary with stats manager…
Let’s try it!
List of Collect statistics commands
COLLECT STATISTICS
COLUMN TvmId ,
COLUMN UserId ,
COLUMN DatabaseId ,
COLUMN FieldId ,
COLUMN AccessRight ,
COLUMN GrantorID ,
COLUMN CreateUID ,
COLUMN (UserId ,DatabaseId) ,
COLUMN (TVMId ,DatabaseId) ,
COLUMN (TVMId ,UserId) ,
COLUMN (DatabaseId,AccessRight) ,
COLUMN (TVMId,AccessRight) ,
COLUMN (FieldId,AccessRight) ,
COLUMN (AccessRight,CreateUID) ,
COLUMN (AccessRight,GrantorID) ,
COLUMN (TVMId ,DatabaseId,UserId)
ON DBC.AccessRights;

COLLECT STATISTICS
COLUMN DatabaseId ,
COLUMN DatabaseName ,
COLUMN DatabaseNameI ,
COLUMN OwnerName ,
COLUMN LastAlterUID ,
COLUMN JournalId ,
COLUMN (DatabaseName,LastAlterUID)
ON DBC.Dbase;


COLLECT STATISTICS
COLUMN LogicalHostId ,
INDEX ( HostName )
ON DBC.Hosts;

COLLECT STATISTICS
COLUMN OWNERID ,
COLUMN OWNEEID ,
COLUMN (OWNEEID ,OWNERID)
ON DBC.Owners;

COLLECT STATISTICS
COLUMN ROLEID ,
COLUMN ROLENAMEI
ON DBC.Roles;

COLLECT STATISTICS
INDEX (GranteeId)
ON DBC.RoleGrants;

COLLECT STATISTICS
COLUMN (TableId) ,
COLUMN (FieldId) ,
COLUMN (FieldName) ,
COLUMN (FieldType) ,
COLUMN (DatabaseId) ,
COLUMN (CreateUID) ,
COLUMN (LastAlterUID) ,
COLUMN (UDTName) ,
COLUMN (TableId,FieldName)
ON DBC.TVFields;

COLLECT STATISTICS
COLUMN TVMID ,
COLUMN TVMNAME ,
COLUMN TVMNameI ,
COLUMN DATABASEID ,
COLUMN TABLEKIND ,
COLUMN CREATEUID ,
COLUMN CreatorName ,
COLUMN LASTALTERUID ,
COLUMN CommitOpt ,
COLUMN (DatabaseId,TVMName) ,
COLUMN (DATABASEID ,TVMNAMEI)
ON DBC.TVM;

COLLECT STATISTICS
INDEX (TableId) ,
COLUMN (FieldId) ,
COLUMN (IndexNumber) ,
COLUMN (IndexType) ,
COLUMN (UniqueFlag) ,
COLUMN (CreateUID) ,
COLUMN (LastAlterUID) ,
COLUMN (TableId,DatabaseId) ,
COLUMN (TableId,FieldId) ,
COLUMN (UniqueFlag,FieldId) ,
COLUMN (UniqueFlag,CreateUID) ,
COLUMN (UniqueFlag,LastAlterUID) ,
COLUMN (TableId,IndexNumber,DatabaseId)
ON DBC.Indexes;

COLLECT STATISTICS
COLUMN (IndexNumber) ,
COLUMN (StatsType)
ON DBC.StatsTbl;

COLLECT STATISTICS
COLUMN (ObjectId) ,
COLUMN (FieldId) ,
COLUMN (IndexNumber) ,
COLUMN (DatabaseId,ObjectId,IndexNumber)
ON DBC.ObjectUsage;

COLLECT STATISTICS
INDEX (FunctionID ) ,
COLUMN DatabaseId ,
COLUMN ( DatabaseId ,FunctionName )
ON DBC.UDFInfo;

COLLECT STATISTICS
COLUMN (TypeName) ,
COLUMN (TypeKind)
ON DBC.UDTInfo;

COLLECT STATISTICS
COLUMN (QueryID)
ON DBC.DBQLSqlTbl;

COLLECT STATISTICS
COLUMN (CollectTimeStamp),
COLUMN (QueryID),
COLUMN (UserID),
COLUMN (SessionID),
COLUMN (AppID),
COLUMN (StartTime),
COLUMN (ErrorCode),
COLUMN (StatementType),
COLUMN (UserName)
ON DBC.DBQLogTbl;
Syncing the DBC dictionary with TDStats database
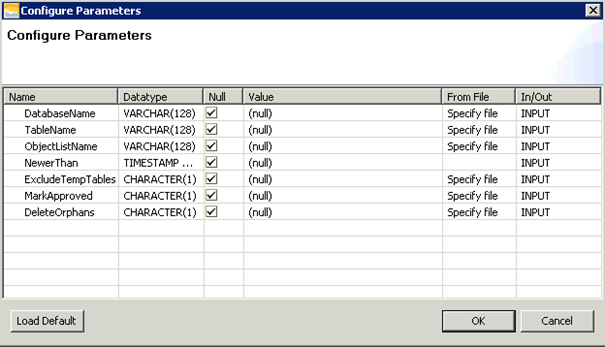
- Uncheck Null case in DatabaseName field
On DatabaseName line, uncheck Null and enter DBC
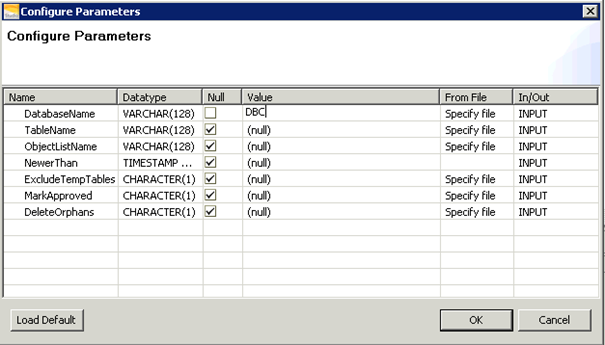
Result
DatabaseName,INPUT,VARCHAR(128),DBC,
TableName,INPUT,VARCHAR(128),,
ObjectListName,INPUT,VARCHAR(128),,
NewerThan,INPUT,TIMESTAMP WITH TIME ZONE,,
ExcludeTempTables,INPUT,CHARACTER(1),,
MarkApproved,INPUT,CHARACTER(1),,
DeleteOrphans,INPUT,CHARACTER(1),,
AutomateId,OUTPUT,BIGINT,,909
NumCopied,OUTPUT,INTEGER,,51
NumRemoved,OUTPUT,INTEGER,,0
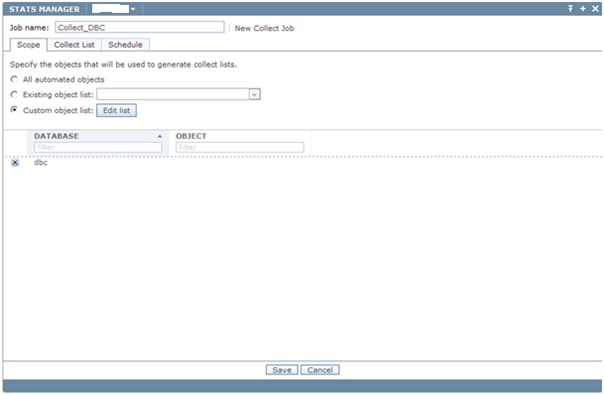
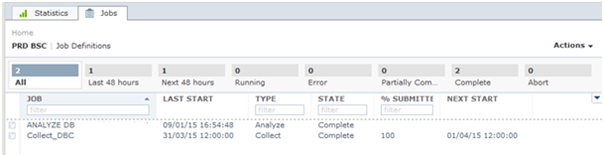
Create Job on Stats Manager
- Click Jobs Tab / Actions / New Collect Job
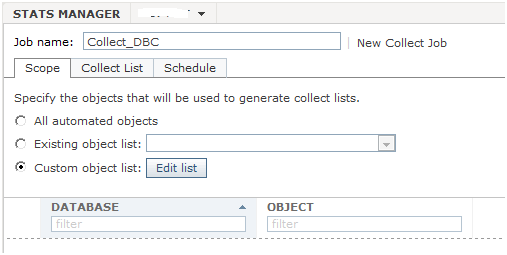
- In Job name field, enter the job’s name
- Check Custom object list
- Click Edit list
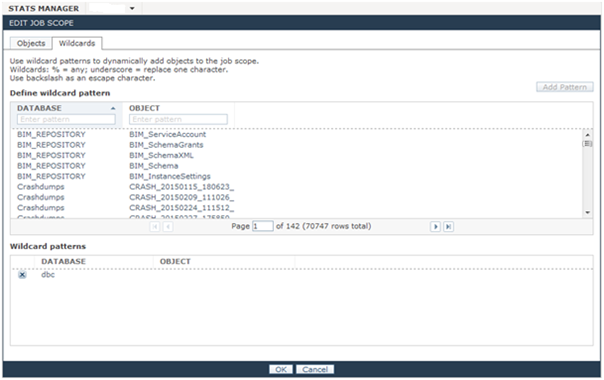
- In Database type DBC
- Click Add Pattern
- Click OK
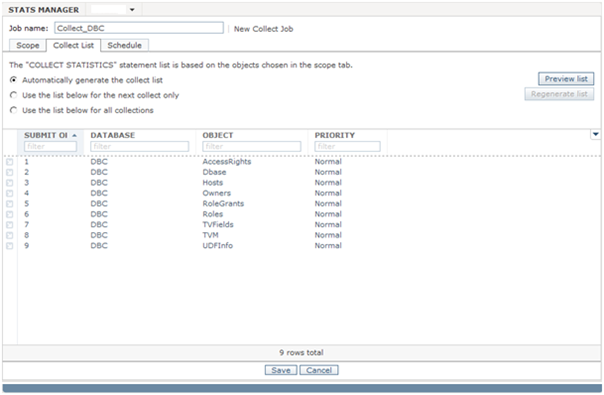
- Click Collect List tab
- Click Preview list
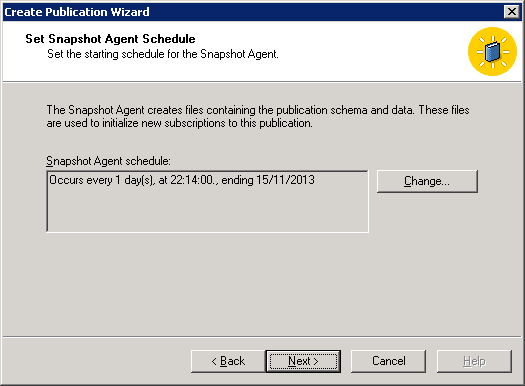
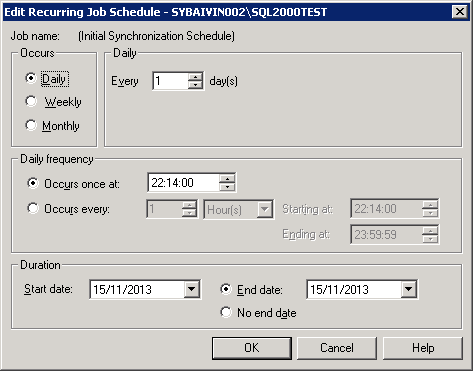
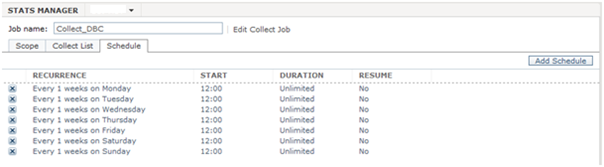
Scheduling a job
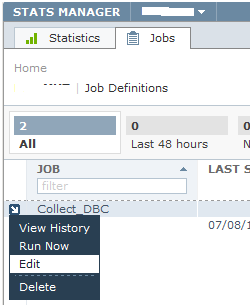
- Click on the blue arrow
- Click Edit

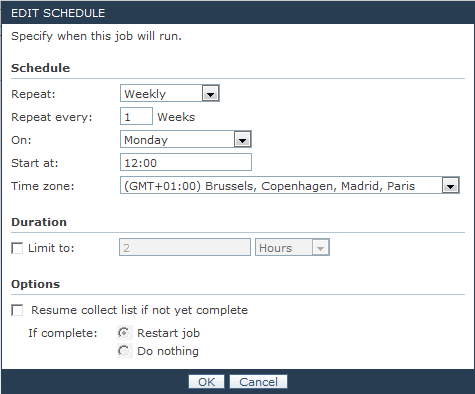
- In Repeat list, select Weekly
- In Repeat every, type 1
- In On, Select Monday
- In Start at, choose the time you want to execute the job
- Click OK
Repeat this operation for every day of the week you want to schedule the job for.
Troubleshooting
Invalid session mode
Failed [5510 : HY000] Invalid session mode for procedure execution.
Solution: Change ANSI Mode To TERA
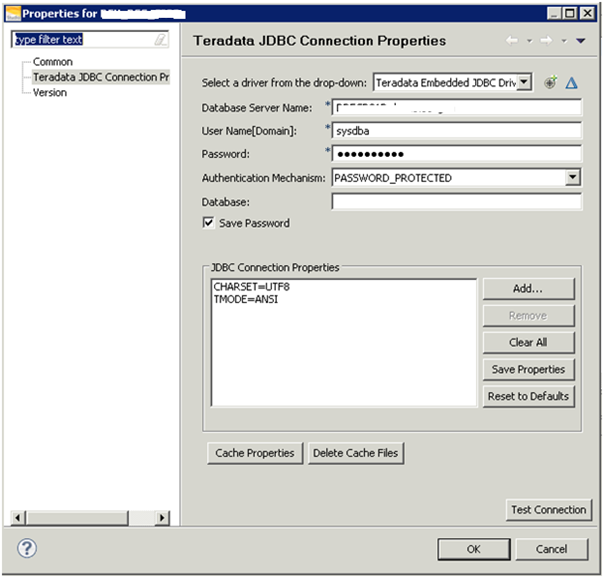
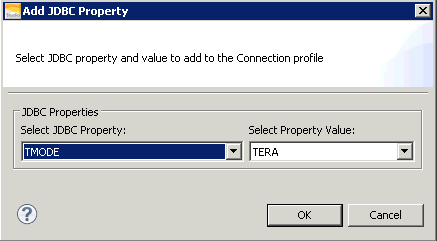
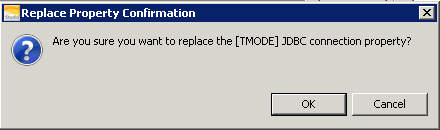
- Click OK
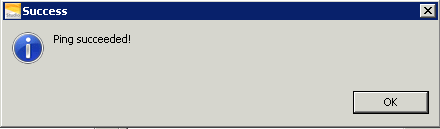
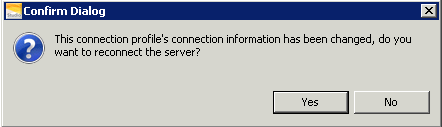
- Click Test Connection
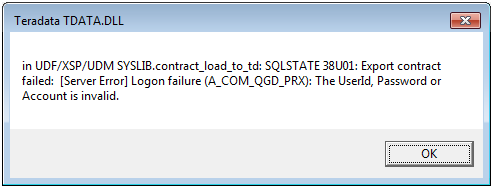
Access problem
The user does not have EXECUTE PROCEDURE access to TDStats.AutomateStats.
Solution
- GRANT EXECUTE PROCEDURE ON TDSTATS TO SYSDBA
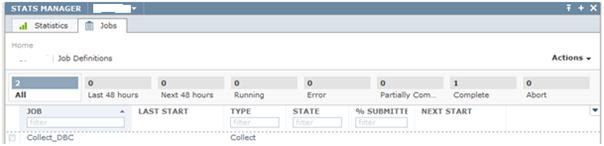
Error after job is completed
Finding the error
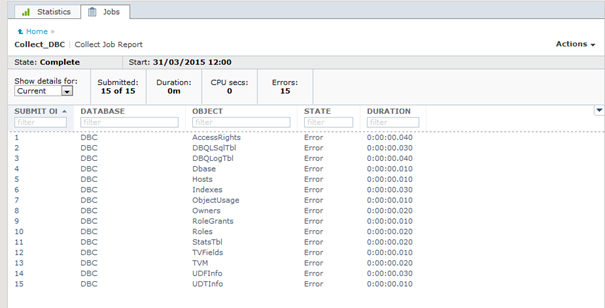
- Click on 1 to view the details of error
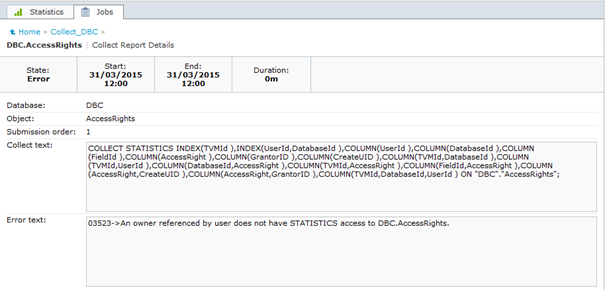
Solution
GRANT STATISTICS ON DBC.TVFields TO TDSTATS;
GRANT STATISTICS ON AccessRights TO TDSTATS;
GRANT STATISTICS ON DBC.DBQLSqlTbl TO TDSTATS;
GRANT STATISTICS ON DBC.DBQLogTbl TO TDSTATS;
GRANT STATISTICS ON DBC.Dbase TO TDSTATS;
GRANT STATISTICS ON DBC.Hosts TO TDSTATS;
GRANT STATISTICS ON DBC.Indexes TO TDSTATS;
GRANT STATISTICS ON DBC.ObjectUsage TO TDSTATS;
GRANT STATISTICS ON DBC.Owners TO TDSTATS;
GRANT STATISTICS ON DBC.RoleGrants TO TDSTATS;
GRANT STATISTICS ON DBC.Roles TO TDSTATS;
GRANT STATISTICS ON DBC.StatsTbl TO TDSTATS;
GRANT STATISTICS ON DBC.TVM TO TDSTATS;
GRANT STATISTICS ON DBC.UDFInfo TO TDSTATS;
GRANT STATISTICS ON DBC.UDTInfo TO TDSTATS;
Run again your job to check if everything is correct now.


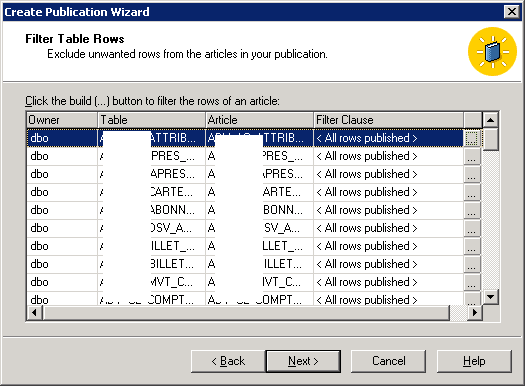
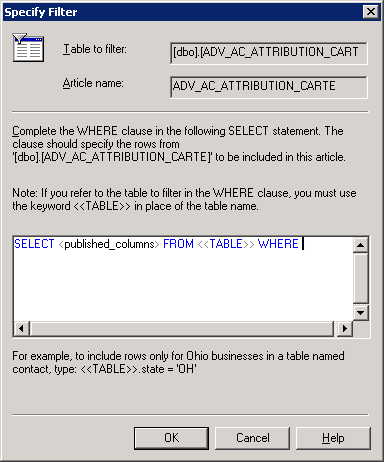
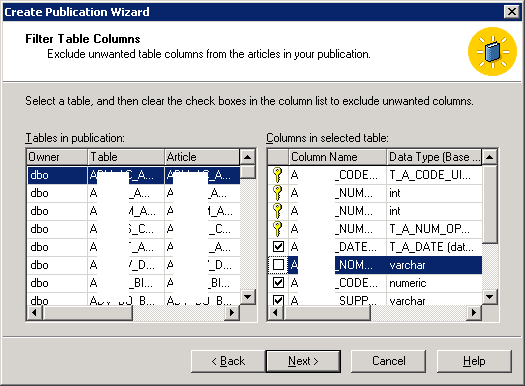 Colum filters